A truck is more than just a vehicle: it's a mobile billboard, displaying your company's name, logo, and brand identity to thousands of people on the roads every day. Yet, it's surprising how many transport businesses miss the opportunity to utilize this surface consciously and effectively. A well-designed, durably applied truck emblem simultaneously identifies the vehicle, strengthens the corporate image, and enhances the perception of reliability. This guide will walk you through the process from design to execution, highlight common mistakes, and help you ensure that your emblem is not only visually appealing but also creates real business value.
Table of Contents
- Why is a custom truck emblem important?
- Required tools and preparations for emblem creation
- Step-by-step: how to create a truck emblem
- Typical mistakes and common pitfalls in truck emblem creation
- Why does a professional emblem really matter in the trucking business?
- Level up with professional trucking equipment
- Frequently Asked Questions
Key Takeaways
| Point | Details |
|---|---|
| Brand-strengthening appearance | A custom truck emblem helps with company recognition and credibility. |
| Importance of quality preparation | A clean and degreased surface is essential for a lasting result. |
| Step-by-step execution | Thorough planning, appropriate material selection, and precise application are needed. |
| Avoiding typical mistakes | Knowing common pitfalls helps prevent the emblem from peeling off or getting damaged. |
Why is a custom truck emblem important?
A custom emblem is not merely an aesthetic decision. It's one of the cheapest, yet most impactful investments a trucking business can make in brand building. Think about it: a truck can travel up to 500 kilometers a day, and on every single kilometer, it reaches potential customers, partners, and fellow drivers.
The emblem as a brand-building tool
Recognizability is a cornerstone of business success. If freight forwarders, warehouse managers, and clients recognize your vehicle from afar, it not only saves time but also builds trust. A consistent, well-designed visual identifier conveys that the company is organized, reliable, and thinks long-term.
Many carriers think that an emblem is just "decoration." This is fundamentally a misconception. In reality, the emblem is a tool for making a first impression, which is often more important than any verbal introduction.
Specific benefits of a custom emblem:
- Easy identification in parking lots, warehouses, and transshipment points
- Professional appearance, which increases customer trust
- Distinction from competitors in crowded markets
- Free advertising on every route
- Perception of fleet unity if multiple vehicles have a similar branding
"The emblem not only indicates whose vehicle it is, but also communicates the quality of service the client can expect."
Interestingly, similar to truck-branded belt bags, the emblem represents a uniform brand element that makes people aware of the brand's presence. When every unit of your fleet carries the same emblem, the message is clear: this is a serious, organized business.
Practical roles on the roads
Beyond branding, a custom emblem also provides specific operational advantages. During security checks and border crossings, clear, highly visible identification speeds up the process. Customers can more easily find the vehicle in high-traffic areas. Handling insurance matters also becomes simpler when the vehicle is visually clearly identifiable.
Required tools and preparations for emblem creation
Now that we've understood why an emblem is important, let's look at what you'll actually need for its implementation. Good preparation here is not optional, but essential. Without a solid foundation, even the best emblem won't last.
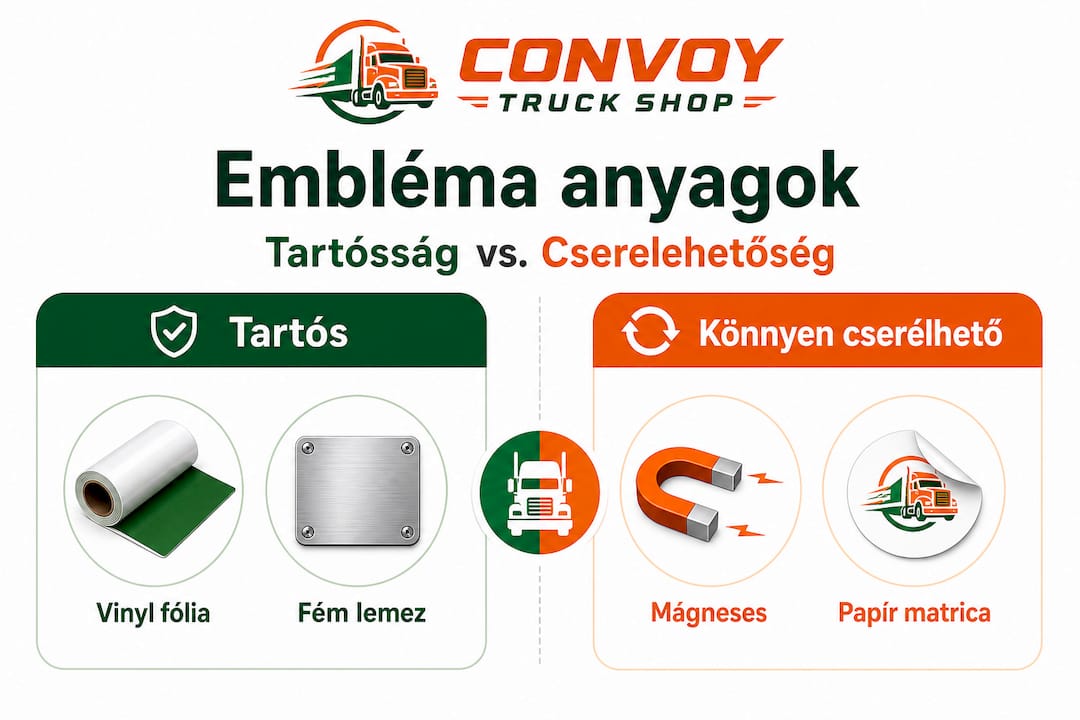
Materials and types
The choice of emblem material fundamentally determines its durability, appearance, and maintenance requirements. Below is a summary of the most common options:
| Material Type | Durability | Weather Resistance | Easily Replaceable | Price |
|---|---|---|---|---|
| Vinyl film | 5-7 years | Excellent | Yes | Medium |
| Magnetic base | 2-4 years | Medium | Very Yes | Low |
| UV-resistant paint | 7-10 years | Excellent | No | High |
| Self-adhesive sticker | 1-3 years | Poor | Yes | Very Low |
| 3D embossed emblem | 10+ years | Excellent | No | High |
For most trucking companies, vinyl film offers the best compromise: it's relatively inexpensive, durable, and can be replaced if needed. Magnetic-based emblems are particularly useful for leased fleets or where branding might change.
Required preparations
Based on truck maintenance tips, proper cleaning and preparation are essential for a lasting result. This is not just general advice but one of the most important principles of the trade.
Steps in the preparation process:
- Washing: thorough high-pressure water washing of the entire surface
- Degreasing: use of special degreasing spray or isopropyl alcohol
- Drying time: at least 30-60 minutes of drying before applying any material
- Temperature check: ideal environment of 15-25 degrees Celsius
- Surface inspection: check for cracks, rust spots, dents
Safety aspects are also not negligible: if you use paint or solvent, ensure adequate ventilation and protective gear (gloves, eye protection). When applying vinyl film, it is advisable to wear heat-protective gloves when using a heat gun.
The right workspace is also important. It's best to work in a closed but well-ventilated garage where there's no wind (which would carry dust onto the freshly cleaned surface) and no direct sunlight (which affects the curing time of adhesives).
Pro tip: If the vehicle is from a previous owner or has older branding, the previous film or sticker must first be removed. A combination of a heat gun and a plastic scraper is the best solution, and any remaining adhesive should be removed with isopropyl alcohol. Do not leave any residue on the surface, as it will cause bubbles under the new emblem.
As inspiration, the trucker t-shirt inspiration also shows how Convoy Truck Shop builds a consistent visual identity in other products, and this mindset is perfectly applicable to emblem creation.
Step-by-step: how to create a truck emblem
With the necessary tools in mind, let's go through the specific implementation process. This is the part where most carriers get stuck, either because they fall behind in planning or rush the execution. Both mistakes can be avoided.
From design to the finished emblem
A well-structured process increases the durability and quality of the emblem. Follow these steps in order; do not skip any.
-
Brainstorming and inspiration: Gather references from other trucking companies' vehicles, online sources, and your own logo. See what works for competitors and think about what would make your solution unique. You'll find many specific examples on the truck decoration steps page.
-
Sketching: On paper, sketch where the emblem should be placed, its proportions, and colors. This doesn't have to be a professional drawing, but it helps visualize the end result. Measure everything: the width, height of the surface, and the positions of any sills, door frames.
-
Digital editing: Create the final design with vector graphics software (e.g., Adobe Illustrator, Inkscape). Vector format is important because it remains sharp regardless of scaling, allowing it to be printed at any size. If you don't have graphic design experience, it's worth involving a professional graphic designer.
-
Material selection: Based on the table in the previous section, decide what material the emblem should be made from. If you're planning for multiple vehicles, vinyl film is the most economical solution.
-
Printing or cutting: You can get printing or cutting done by professional foil makers. More and more local print shops offer vinyl film printing and contour cutting. Request UV-resistant ink, otherwise the emblem will quickly fade in sunlight.
-
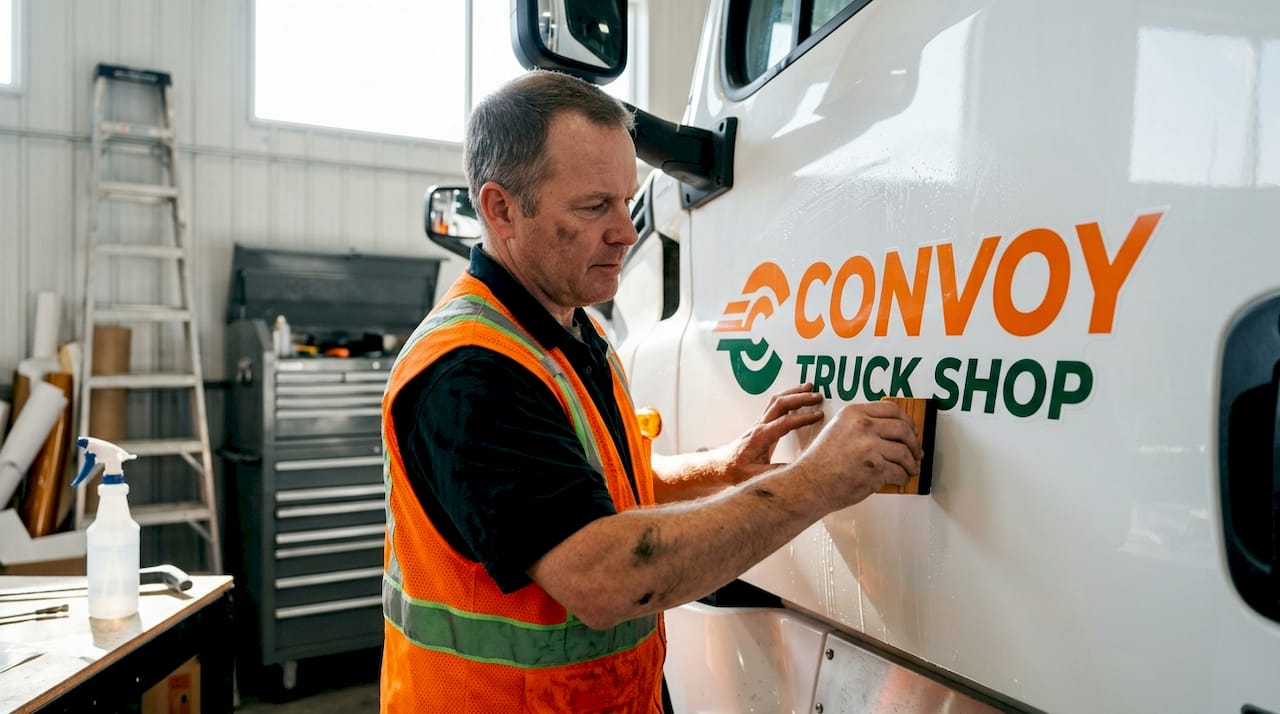
Application to the vehicle: This is the most critical step. First, apply it without adhesive tape (dry) to check the position. Use a ruler and level. While applying, slowly pull off the backing, while smoothing out bubbles from the center outwards with a squeegee.
-
Final inspection: Check the edges, corners, and any bubbles. A little heat (heat gun or blower) can help remove stubborn bubbles. Finally, wipe the surface with a clean, dry cloth.
Material type comparison for specific use
| Use Case | Recommended Material | Note |
|---|---|---|
| Own fleet, permanent branding | Vinyl film + UV-laminated | Best value for money |
| Leased vehicle, temporary branding | Magnetic base | Easily removable |
| Premium, custom emblem image | 3D embossed sticker | Recommended for smaller sizes only |
| Promotional, short campaign | Simple self-adhesive sticker | Suitable for maximum 6 months |
Pro tip: Never apply the emblem in cold weather (below 0 degrees Celsius) or direct sunlight. In both cases, the adhesive will not bond properly, and the emblem will peel off sooner. The best results are achieved in a shaded area at 18-22 degrees Celsius. If winter application is absolutely necessary, preheat the surface with a heat gun before application.
The personalized gift ideas page also shows that unique visual identification always makes a stronger impression than generic solutions. This principle also applies to emblem creation.
Typical mistakes and common pitfalls in truck emblem creation
After following the steps, let's examine what mistakes can occur in the process and how to prevent them. These are the mistakes we see most often, and almost all of them could have been avoided with a little attention.
List of most common mistakes
-
Inadequate surface preparation: The reason for most early peeling is simply that a little grease, dust, or moisture remained on the surface. You might think you cleaned it thoroughly, but if you didn't degrease it, the adhesive won't stick properly.
-
Choosing cheap, non-UV-resistant material: The cheapest film found online will likely fade, crack, or peel within 6-12 months. Quality vinyl film is more expensive but lasts problem-free for 5-7 years.
-
Inaccurate positioning: If you don't use a level and measuring tape, the emblem can easily become crooked, detracting from a professional appearance. This is particularly noticeable with long, horizontal lettering.
-
Ignoring weather conditions: Adhesives do not work optimally on rainy, freezing, or extremely hot days. Many carriers make this mistake because they "can't wait any longer" to apply it.
-
Incorrect sizing: The emblem is either too large and distorts the vehicle's proportions, or too small and not visible from a distance. It's worth making at least two trial prints of different sizes and actually holding them up to the vehicle to see which fits better.
-
Neglecting the edges: The edges of the emblem require the most attention. If the edge isn't pressed down properly, that's where it will start to peel first, especially in a car wash or heavy rain.
"The most important thing is proper base preparation and the use of quality material." Based on these lasting maintenance tips, this cannot be emphasized enough: the right raw material is essential for a lasting result.
The most dangerous misunderstanding
Many people think that a more expensive print automatically means better quality. This is not always true. The durability of an emblem depends 70% on the application process and only 30% on the material. We have seen premium film peel off within a week because the surface was not properly prepared.
The same experience applies to lighting adjustment advice: a professional result always depends on the details, not on expensive tools. Similarly, patience and thoroughness are key in emblem creation.
What to do if the emblem is already peeling off?
If the edge starts to lift, don't ignore it. A small heat gun and a little special clear adhesive (vinyl compatible) will quickly re-secure the lifted edges. If a bubble forms, a needle and a little heat will solve the problem: prick the bubble, then smooth down the film with heat.
Why does a professional emblem really matter in the trucking business?
Based on 30 years of experience that Convoy Truck Shop has gained in the trucking industry, we have an observation that is rarely voiced: the most successful trucking companies don't necessarily choose the most complex, most expensive emblems. Quite the opposite.
Simple, clean, easily readable designs are almost always more timeless than extravagant, cluttered patterns. Why? Because people's brains have a fraction of a second to absorb the visual message of a moving vehicle. If the emblem is simple and contrasting, it sticks in people's minds. If it's too complex, it becomes invisible.
There's another uncomfortable truth. Many trucking companies plan their emblem last, after the vehicle has been put into service, almost as an afterthought. This is doing things backwards. The best approach is to design the brand identity along with the business identity, not just stick it on afterwards.
Customer behavior is also instructive. Logistics decision-makers are more likely to choose a carrier whose vehicles carry a consistent, professional-looking brand identity. This is not merely a subjective impression, but a conscious business decision: a professional appearance indicates reliability and organization. No one would entrust valuable goods to a tattered, unmarked truck.
In our experience, the best emblems have three qualities: they are visible from afar, instantly understandable, and easy to remember. If an emblem contains an element that meets all three, it's a true brand asset. If you try to be everyone, you'll be no one.
It's also worth considering that an emblem doesn't just affect customers. It also affects your own drivers. A fleet with a consistent, professional image makes drivers prouder, and this pride is reflected in the quality of their work. This is the "soft" advantage that is rarely quantified, but always manifests itself in the long run.
Level up with professional truck accessories
To carry out the steps above and maintain the well-kept appearance of your vehicle in the long term, you need not only a good plan but also reliable tools.

Convoy Truck Shop offers everything you might need before, during, and after emblem creation. Cleaning and preparation: the car wash sponge and brush are specifically suitable for heavy industrial surfaces and help create the best foundation for your emblem. Thinking of days on the road, a tire repair kit for trucks should also always be on hand to ensure professional preparedness behind a professional appearance. If you source the necessary tools for your fleet from a single reliable source, you save time and energy, and quality is guaranteed.
Frequently Asked Questions
What material should a truck emblem be made from?
The most popular materials are vinyl foil, magnetic backing, and UV-resistant paint, as these are durable and withstand weather well. The best choice of appropriate raw material depends on the vehicle's use and the planned frequency of replacement.
What is the most important step before application?
Thorough cleaning and degreasing of the vehicle's surface are essential for the emblem to adhere permanently. Surface preparation determines the emblem's lifespan, so it's worth dedicating as much time to it as to the application itself.
What causes premature peeling of an emblem?
Generally, it's due to faulty application, such as a dusty or damp surface, and the use of poor quality materials. Quality raw materials and thorough preparation are both essential for a lasting result.
Where can one draw inspiration for designing a truck emblem?
Existing truck decorations, online inspirations, or advice from experts can help create a unique design. For creative designs, it's useful to review references, and it's worth looking at specific truck decoration examples before making a decision.